Create a Step Function
First published on: Medium
In our first tutorial which is An Introduction to the AWS Step Function, we tried to explore what is an AWS Step Function. Our second and third tutorial are Amazon States Language: part-1 and Amazon States Language: part-2 where we explored how to define a Step Function with a json schema based language called Amazon States Language. In this module, we will try to create a very basic Step function. Once you understand how a Step function works and how to create them then we will continue to the next section where we will develop a bit more complex Step function with different AWS Services.
Pre-requisite
Please read the following before going through this tutorial:
Getting started with an AWS Step Function
This module consists of three parts:
. Create a State Machine . Start a New Execution
Create a State Machine
1) First, sign in to the AWS Management Console. Then go to this link to open the Step function console. [Please, change the region to your preferred one. Mine is Ohio, us-east-2]
2) You’ll see a page like this:
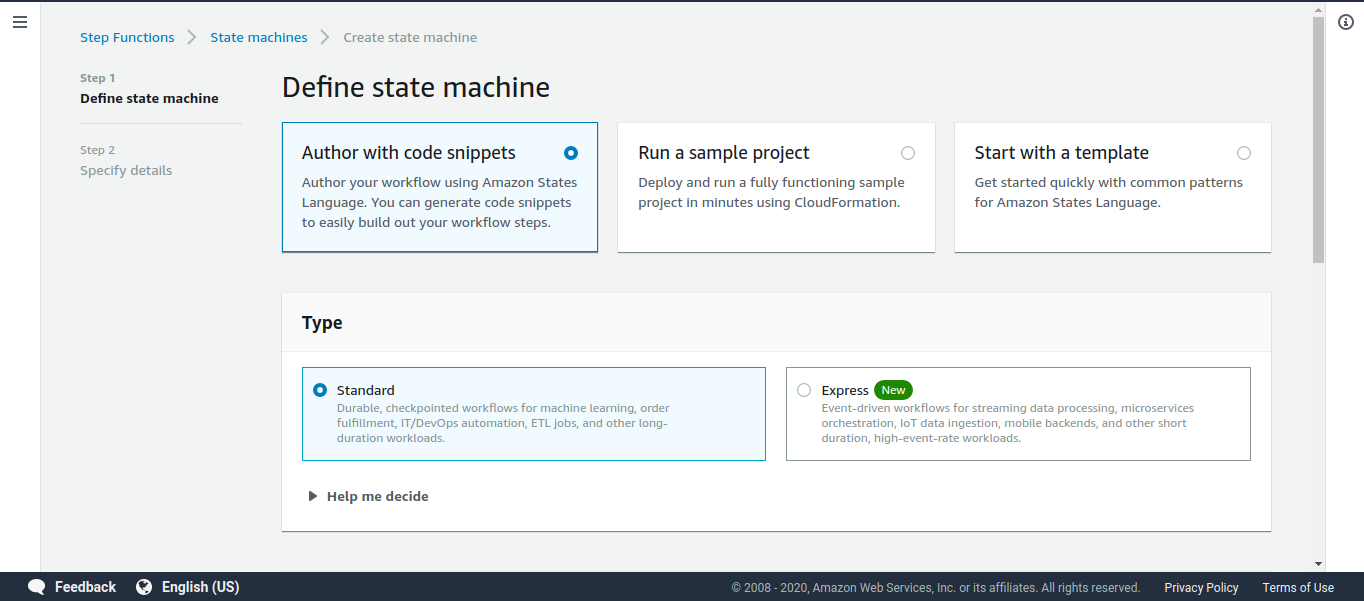
3) Now, you can choose the Start with a template option and choose the Hello World templates.
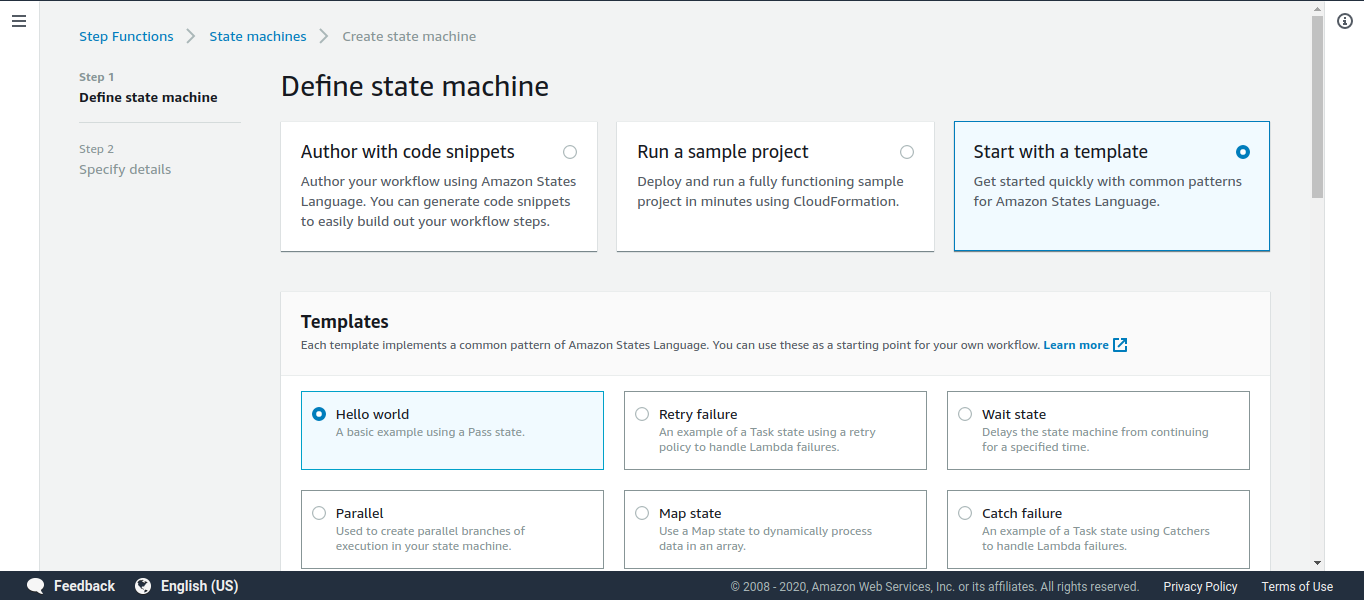
4) After this scroll down a bit and you’ll find a section like this:

5) Scroll down again and you’ll see another section named Definition.
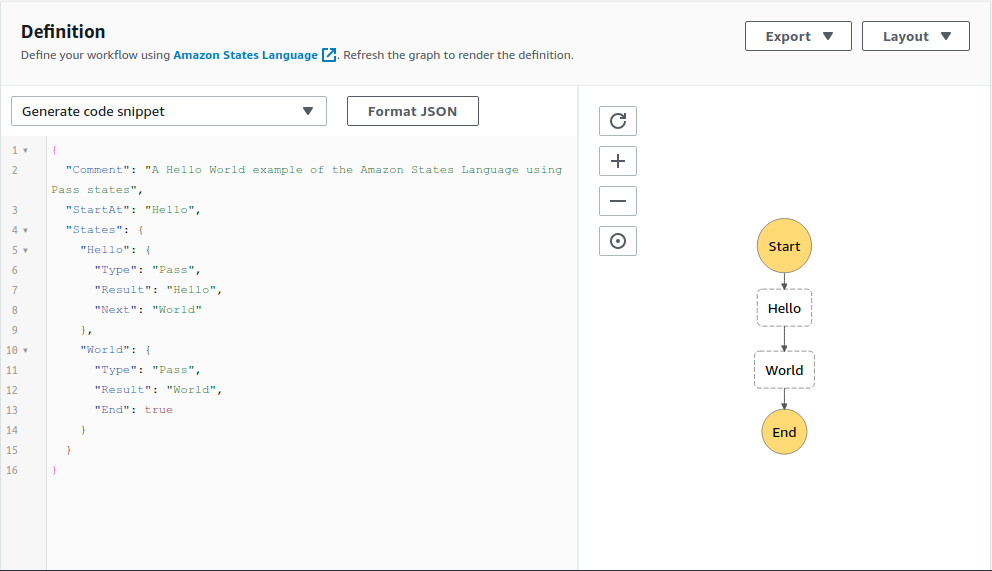
6) As you can see this definition is the definition of the Step Function. And the language is just like we discussed earlier, the Amazon States Language. Let’s keep the definition as it is.
In the right panel, you can see a graph. This is one of the most interesting parts of the Step Function. As you define a step function, this graph will be generated which will graphically show you the execution flow like a flow chart!
With the help of this auto-generated graph, you don’t have to manually write any documentation for this system. You can easily look at this graph and understand the flow. Even any of a different team member can easily understand the flow of the system by taking a look at this graph. :D
7) Now click the Next button to go to the next step.
8) In this step, you’ll have to mention the details of the Step function.
9) Give a name to your step function.

10) Choose a role.

11) You’ll see a page where the first portion of the page will look like this:

Here you can see the ARN and your role.
12) Scroll down and you’ll see another section:

This is basically the dashboard of the Step function. Here you can see all the executions list. Currently, we don’t have any. So let’s start execution by clicking the Start execution button.
Start a New Execution
1) After clicking the Start execution button you’ll see a pop-up page:
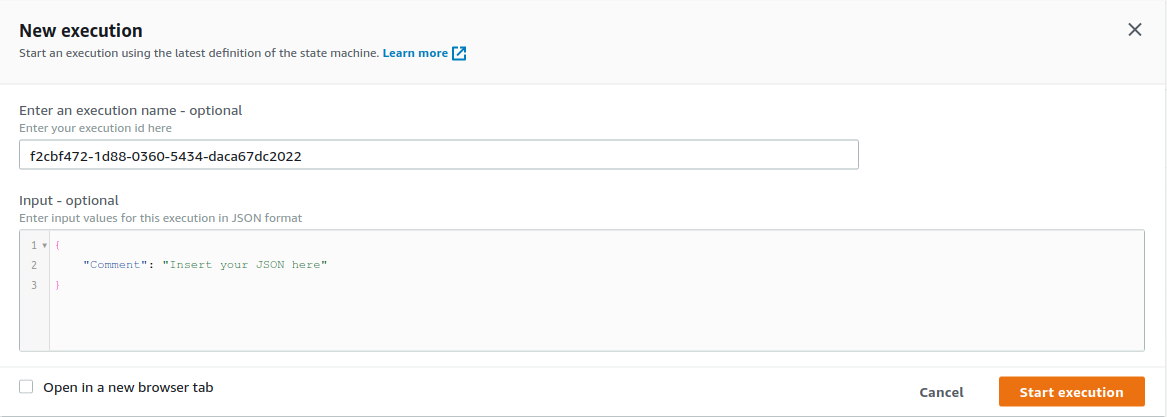
2) The execution-id is a unique id for each time you start executing a step function. This uniques id is auto-generated. (Definitely, you can change it. But let’s keep it to as it is!)
3) The input field is the field where you mention the input for this step function. This input must be in json format. Let’s keep the input field as it is!
If you remember it from Amazon State Language part-2, we introduced a special sign
$. The$is actually holding our whole input meaning the$is basically our input. As the input must in json format, you can access any field with$.field_name. For example, if we want to access the Comment field from our input, we can write,$.Comment.
4) Click the Start execution button.
5) The step function will start executing and after some time it will take you to the dashboard.
6) The first section of the dashboard will now look like this:
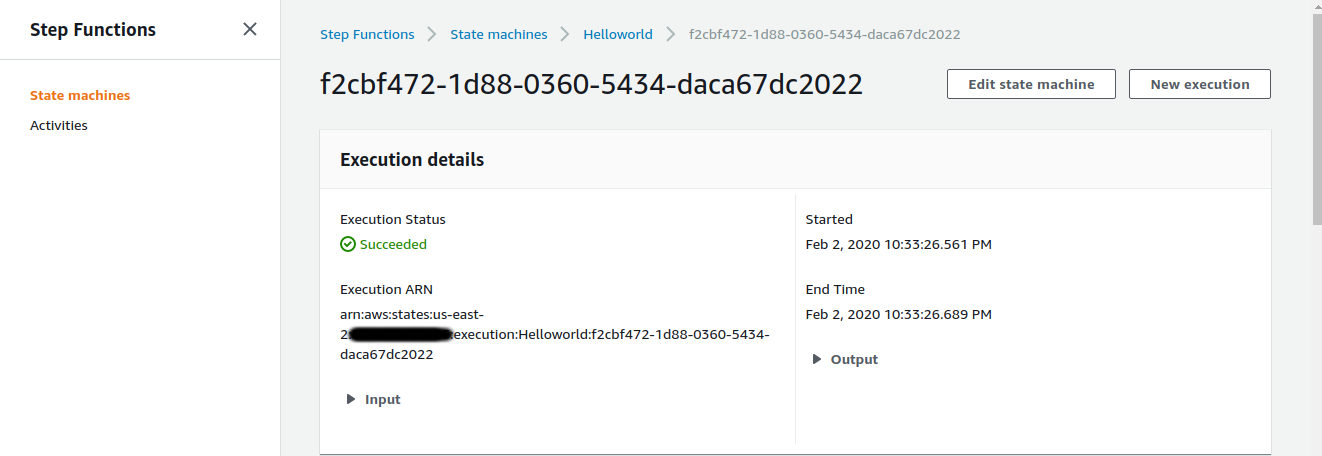
7) If you remember before starting the execution, the execution id that was auto-generated for this execution is f2cbf472-.......-daca67dc2022. Here you can also see this id. Against this id, the execution took place. You can also see the Execution Status. It’s saying Succeeded. That means our step function executed successfully.
8) If you scroll down, you’ll see another section:
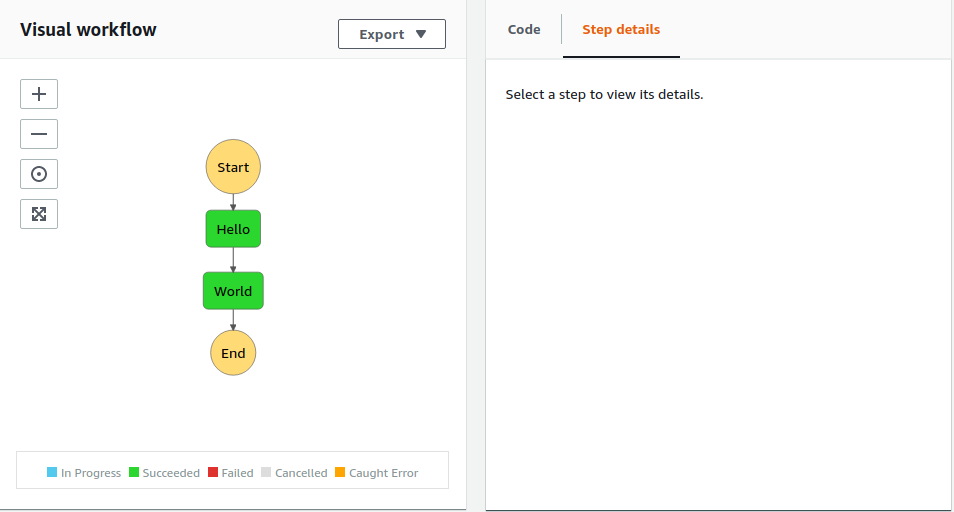
This is the visual workflow that’s describing the flow of the execution.
If you remember the definition of this step function which is given below:
{
  "Comment": "A Hello World example of the Amazon States Language using Pass states",
  "StartAt": "Hello",
  "States": {
    "Hello": {
      "Type": "Pass",
      "Result": "Hello",
      "Next": "World"
    },
    "World": {
      "Type": "Pass",
      "Result": "World",
      "End": true
    }
  }
}
We have two states, Hello and World. Both of them has the type "Type": "Pass". Meaning they will not process anything and will just pass the execution to the next state.
The execution starts at the state define in StartAt which is our Hello state.
So, from the above visual workflow, you can easily understand how the execution happened.
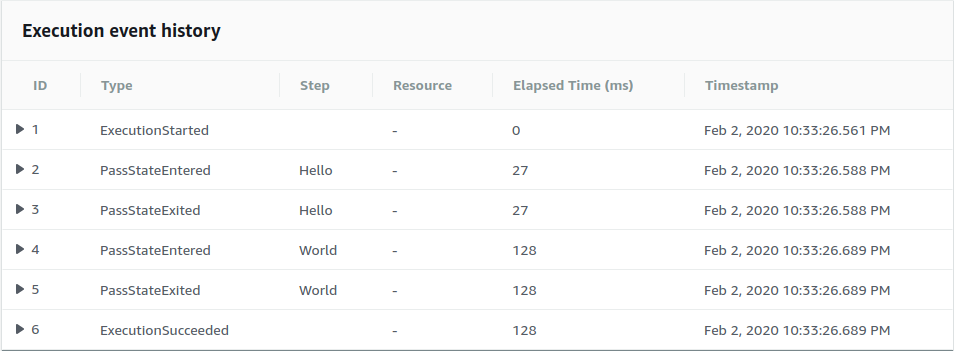
9) Scroll down again and you’ll see Execution event history. In this part, you can see the details of each state’s input, output, and execution time.
So that’s it from this module.
In the next module, we’ll update this Step function and design a new flow. And in the next tutorial we’ll see a Choice Based Step Function which controls the flow based on different choices that can be made based on the type of the event. Till then enjoy yourself :D
You can get the whole tutorial series from here: A Journey to the AWS Step Function.